There are many different reasons to install floor insulation before or after flooring. The most common reason homeowners delay or abandon suspended floor insulation is the assumption that the floorboards need to come up. In many properties they do not. Accessing the subfloor void from below, through an airbrick opening or a hatch cut in the floor, and fitting insulation between the joists without disturbing the boards above is a well established approach that preserves original flooring and avoids the cost and disruption of lifting and relaying.
This article explains when access from below is possible, how the work proceeds, what it cannot achieve, and the specific scenarios where lifting boards is genuinely unavoidable.
Floor Insulation Before or After Flooring: The Two Routes Into a Suspended Floor
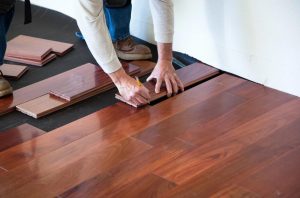
From Above (Lifting Boards)
Floorboards come up, insulation fits between the joists from above, boards go back down. This gives clean, unobstructed access to the full joist depth and allows inspection of every joist along its length. It is the preferred approach where the floor is being replaced or refurbished for other reasons, or where access from below is not possible.
The downsides are significant. Lifting and relaying boards, particularly original tongue and groove pine boards that have been down for a century, is skilled, time consuming work. Boards split, tongue and groove joints break, and boards that were straight when they went down bow or cup when they come up. Fitting them back seamlessly is not straightforward. For homeowners with original Victorian pine boards they want to preserve, lifting is a last resort rather than a first choice.
From Below (Subfloor Access)
Where the subfloor void is accessible, an installer works underneath the floor without touching the boards above. The insulation goes up between the joists and a retaining system holds it in place. The floor surface above remains completely undisturbed.
This is the approach that makes suspended floor insulation practical for homeowners who do not want to disturb original floors. It is also typically faster and less expensive than lifting boards, because the skilled finishing work of relaying boards is eliminated.
When Access From Below Is Possible
Three conditions need to be met for subfloor access to be practical:
The void is deep enough to work in. A minimum clearance of around 400mm between the ground and the underside of the joists allows an installer to move through the void in a crawling or lying position. Below this, the work becomes extremely confined and may not be achievable by all contractors.
There is an entry point into the void. An airbrick opening enlarged temporarily, or an access hatch cut in the floor from above, provides entry. Most subfloor voids on pre war terraces and semis have airbricks large enough to enlarge to a workable entry point. Where no suitable entry exists, a hatch needs cutting in the floor, a small, manageable opening, not a full board lift.
The void is clear of obstructions. Water supply pipes, drain runs, sleeper walls, and structural elements all affect how freely an installer can move through the void. A property with a complex arrangement of pipework or with very low sleeper walls may restrict movement to the point where full coverage from below is not achievable.
A site visit by an experienced installer confirms whether access from below is possible before any work is committed to.
How the Installation Proceeds From Below
Once the installer is in the void, the sequence is:
Inspection of joist condition. Before any insulation goes in, the installer checks each joist for signs of rot, beetle damage, or structural compromise. Any joist that needs attention is flagged before the insulation makes it inaccessible from below. This is one of the advantages of working from below, the underside of every joist is visible and checkable.
Pipe lagging. Any water supply pipes running through the void get lagged with foam pipe insulation before the floor insulation goes in. The insulation changes the thermal environment around the pipes, and pipes that previously sat in a relatively mild void now sit on the cold side of the insulation. Lagging protects them from freezing in extreme cold.
Cutting and fitting insulation boards. Rigid PIR or EPS boards cut to fit snugly between each pair of joists, from wall to wall. The fit needs to be tight at the edges, gaps allow cold air from the void to bypass the insulation. Where pipes or noggins interrupt the run, the boards cut around them. Wall insulation should also be considered.
Retaining the insulation. Boards fitted from below need something to hold them up. The main options are:
Netting, polypropylene mesh stapled to the underside of the joists before the boards go in, creating a hammock that the boards rest on.
Battens, small timber battens nailed across the joists at intervals below the insulation boards, creating a ledge that holds the boards up.
Purpose made clips, plastic retaining clips that snap over the joist edges and grip the boards in position.
Airbrick clearance check. Before leaving the void, the installer confirms that all airbricks are clear and that the ventilation path through the void is unobstructed. The void below the insulation still needs to breathe.
What You Cannot Achieve From Below
Access from below is excellent for fitting insulation but has limitations compared to a full board lift:
Perimeter insulation at the wall plate. Where the joists run into the external wall, the last few centimetres of the joist bay are often inaccessible from below because the wall plate sits in the way. This leaves a small thermal bridge at the perimeter of the floor. On a typical property this is a relatively small proportion of the total floor area and the performance impact is limited, but it is not as thermally complete as an installation done from above.
Addressing structural defects. If joist inspection from below reveals rot or damage, the repair work typically requires access from above. The installer can identify the defect but fixing it may require lifting boards over the affected area and rethinking floor insulation before or after flooring
..
Dealing with highly complex pipework. Where pipework runs densely through the void in a way that prevents the installer reaching specific joist bays, those sections cannot be insulated from below. A board lift over the affected area may be needed to complete the coverage.
Preserving Original Floorboards: Practical Considerations
For homeowners specifically wanting to avoid disrupting original boards, access from below eliminates all disturbance to the floor surface. But a few points are worth noting:
Draught sealing at the boards. Insulating the void from below significantly reduces cold air rising through the void, but gaps between individual boards and around the perimeter of the room still allow some draughts. Draught sealing the boards, using a flexible sealant in the gaps between boards, complements the insulation and eliminates residual draughts without disturbing the boards. This can be done from above before the below floor work starts.
Original boards and vapour movement. Old pine boards are not airtight. They allow some vapour exchange between the room above and the void below. The insulation from below, combined with a vapour control layer if one is fitted, changes the vapour dynamics slightly. In most cases this is benign, but in properties with very high internal humidity it is worth discussing with the installer.
When Lifting Boards Is Genuinely Necessary
Despite the advantages of below floor access, some situations require a board lift:
The void is too shallow for human access. Voids below 300 to 400mm deep cannot accommodate an installer working from below. Blown insulation is sometimes possible as an alternative, but board access from above may be the only practical option.
Structural repairs are needed. Rot, beetle damage, or damaged joists identified during the survey require repair from above.
The floor is being replaced anyway. If the existing boards are being replaced with engineered timber or another flooring product, the insulation installs during the floor replacement with no additional disruption.
The void contains extensive obstruction. A void with dense pipework, structural elements blocking movement, or very low sleeper walls that prevent the installer from reaching all joist bays may leave no practical alternative.
Frequently Asked Questions: Floor Insulation Before or After Flooring
Will insulating from below cause the floor to feel different underfoot? No. The insulation sits below the existing boards and does not affect how the floor feels or sounds. Boards that were springy remain springy. Boards that were firm remain firm.
How long does a below floor installation take? For a typical two bedroom terrace with a clear, accessible void, one to two days. Larger properties or voids with more complex pipework take longer.
Can I do this myself? Yes, if the void is accessible and you are comfortable working in a confined, dusty space. Floor Insulation Before or After Flooring can both be achieved as DIY. The main requirements are correct sizing of the boards, a tight fit at the edges, and a reliable retaining system. If you are not comfortable in confined spaces, use a professional.
What U value does below floor insulation achieve? With 100mm PIR boards fitted tightly between joists, the floor U value typically reaches 0.18 to 0.25 W/m²K, down from an uninsulated starting point of around 0.7 to 1.0 W/m²K. The exact figure depends on joist depth and the insulation product used.
 Information correct as of April 2026 to decide to whether to install floor insulation before or after flooring. Always have the subfloor void inspected before installation to confirm joist condition, access feasibility, and void depth.